Both a Course Catalog Curricula and a Mapping Curricula must ultimately have a defined audience to which the Curricula applies.
To create the audience, go to the Audience tab of the selected curriculum.
There are two methods for creating an audience - Domain-Based Rules (Default View) or the Audience Rules Engine (New View).
The Audience Rules Engine offers many new and advanced options for defining an audience.
Once the Curricula and Audience are saved with one of the two methods, you can no longer switch to the other method for that Curricula.
This document contains instructions on both methods.
For more information on the new Audience Rules Engine, skip down to Using the Audience Rules Engine (New View).
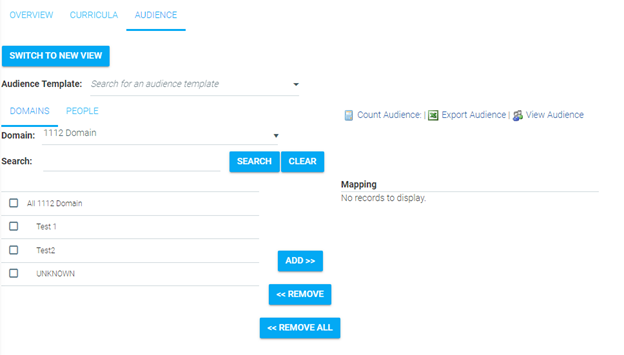
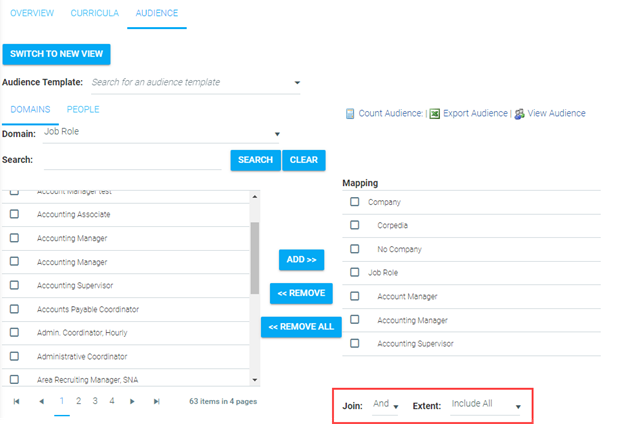
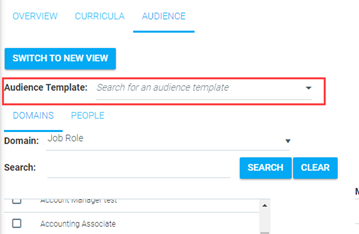
The audience can be defined using the Domains tab and/or the People tab or by using an audience template.
To set the audience in the Domains tab, click the Domain down arrow and select a domain from the drop-down list.
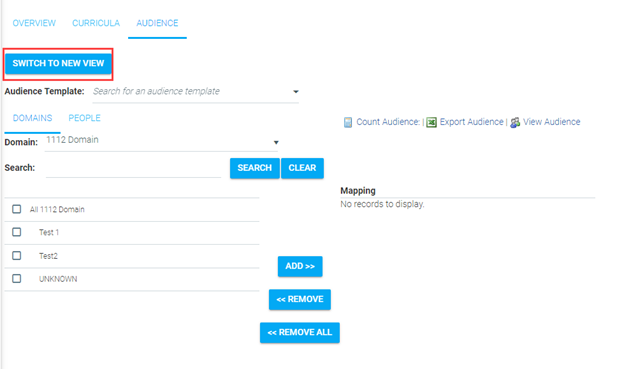
You can also use the Search function to search for a domain. Select one or more domains from the results by selecting the check boxes in the left panel and clicking the Add button. The domain(s) you selected will appear in the right Mapping panel.
Below the Mapping panel on the right are the options for how multiple domains should be joined together.
The People tab can be used to add individual people to an audience that may not already be included in the domains you selected, or to exclude individuals within a domain you selected. The People Tab can also be the sole source of the audience mapping, allowing an administrator to create a “hand-picked” audience that is not reliant on domains.
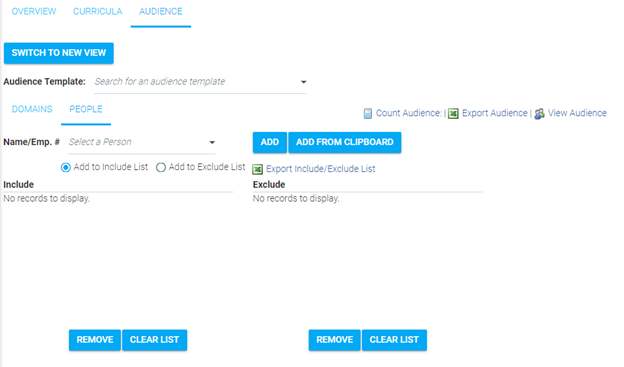
To map in the People tab, enter each person's last name or employee number in the Name/Emp. # field. All matching names will automatically appear in a drop-down. Select the correct name and click the Add button. By default, the name will appear in the Include panel. To add a person to the Exclude list, select the Add to Exclude List radio button, then click Add. The person's name will appear in the Exclude panel.
To remove names from the list, select the checkbox next to the name and click the Remove button, or click Clear List to start completely over.
To add lists of people from other sources, such as an Excel or text file, click the Add from Clipboard button. A pop-up window will appear to start the Paste from Clipboard wizard.
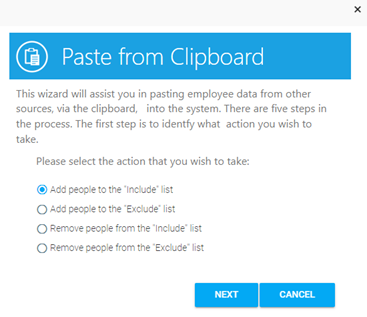
Select one of the following options:
On the next screen, select the type of data that will be used, and select what separates the data. If all of the data is in a column or row in Excel, leave it at the “Tab” default.
On the next screen, paste the selected data onto the clipboard
The system will alert you to any data that it could not read. If there are any errors, correct the data in your document (Excel), then click the Previous button to re-paste the information. When all information is correct, click the Finish button.
The names that you pasted on to the clipboard will now appear on the screen.
To use an audience template to define the curriculum audience, simply select the desired audience template from the drop-down list available just below the Curriculum sub-tabs.
Audience templates can be created on the Resources > Maintain Audience Templates screen.
When the audience has been defined, click Save.
A new UI (User Interface) is now available for the Audience tab which makes it easier for administrators to apply audience rules to mapping curricula.
To access the new UI, click the Switch to New View button on the Audience tab.
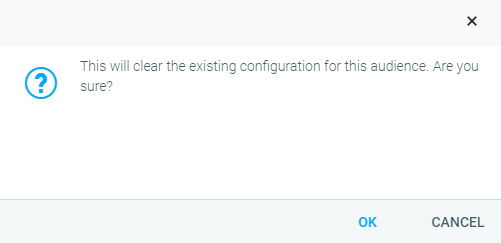
A pop-up box will appear to confirm that you wish to switch to the new view. If you have made any changes using the old view of the Audience tab, they will be deleted when switching to the new view. Click OK if you wish to proceed to the new view. Click Cancel to remain in the old view.
After switching to the new view, you will see the following screen with the new Audience Rules Engine.
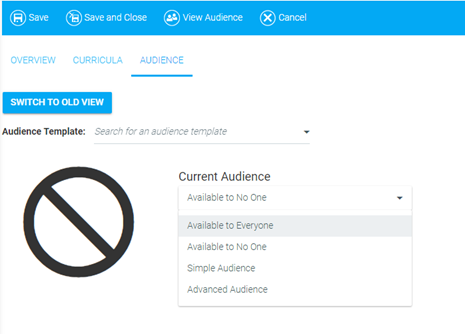
The new Audience Rules Engine allows administrators to create audience rules for each curriculum by making the audience available to everyone or no one, or by creating and utilizing simple or advanced audience rules. For instructions on creating audience rules, see Creating a Simple Audience Rule and Creating an Advanced Audience Rule or visit the Using Audiences section of the Online Help.
You can still utilize existing audience templates by selecting the desired audience template from the drop-down list available just below the Curriculum sub-tabs.
You can revert back to the old view by clicking the Switch to Old View button.
Create, Modify, or Deactivate Curriculum
Add or Modify Resources in a Mapping Curriculum
To learn more about creating audience rules, select from the list below or from the Help navigation tree.